
Hi there friends!
Today we're going back to basics, and I'm going to show you all how to complete a single layer applique design on an embroidery machine.

When I bought my first machine, I had no idea how to actually use it or the steps involved in creating an applique. It took a lot of trial and error, and since machine embroidery wasn't as wildly popular as it is today, there wasn't a ton of information out there on how to do it.

I remember feeling like this a lot!
So, for anyone out there that is new to machine embroidery, I hope this post is helpful to you and sheds some light on the whole process of applique!
So here we go...
How to Stitch Out a Single Layer Applique:
Before I can get started, I had to load an applique design from my computer
to my machine, place a piece of cut-away stabilizer in my embroidery hoop,
and attach the hoop to the machine.

Once you have that done, you're ready to get stitching!
Basically, every applique design is made up of four steps.
So follow along with me as I complete the steps to execute a
perfect applique using your embroidery machine.
1. Trace Stitch - which shows you where to put your fabric

Once you see how large the design is going to be, grab your fabric
and cut a piece large enough to cover the area traced by your machine.
I usually iron my piece of fabric before I put it on the machine,
so that it's flat and I won't end up with any bubbles.

After you cut and iron your fabric, place it on your stabilizer
and make sure it covers the trace stitches completely.

Now that your fabric is in place and flat, start the next step on your machine.
2. Tack Down Stitch - which tacks your fabric down to your stabilizer

The fabric is tacked down and I'm ready for the next step!
3. Trim your fabric!

Detach your hoop from your machine, and grab your favorite pair of
curved tipped scissors and get to trimming!

Make sure you cut as close to the edge as possible,
without snipping the fabric inside the stitching. Once you have that done,
put your hoop back on your machine, and you're ready for the next step!
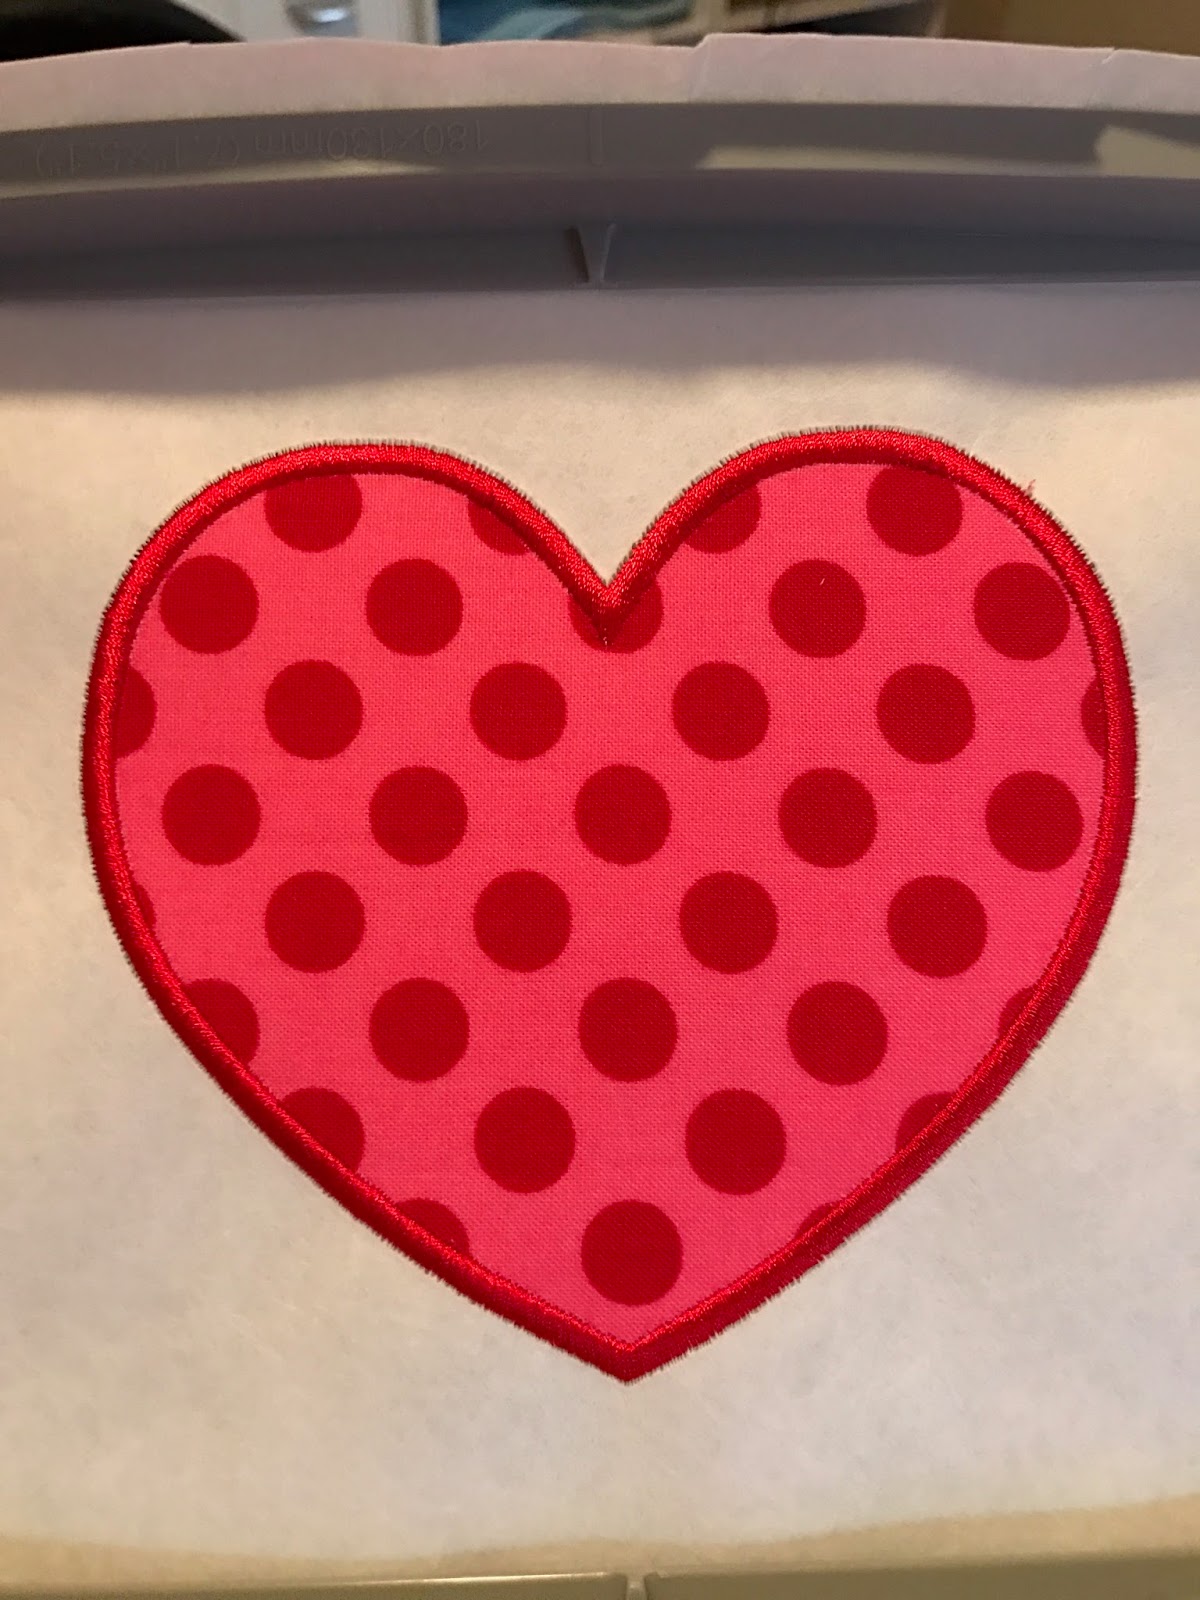
4. Cover Stitches - usually a combination of straight, zig zag, and statin stitching that finishes the edge of your applique

This step takes the longest, because the edge of finished applique
is made up of a series of underlay stitching that secures the fabric
to the garment or stabilizer.
Most appliqués are completed with a satin stitch as seen above.

Once you're done, your machine should give you a little message
like this, and you can remove your hoop from the machine!
You're done!!
I hope this tutorial was helpful to you!!
You can find this heart applique design in my etsy shop! :)
Happy sewing!!


No comments:
Post a Comment